Switching to HTTPS on Webfaction
https://wesort.co.uk/blog/writing/switching-to-https-on-webfaction
Update: As of 17 September 2018, this process is outmoded as HTTPS can be fully enabled in the Webfaction control panel according to this blog post.
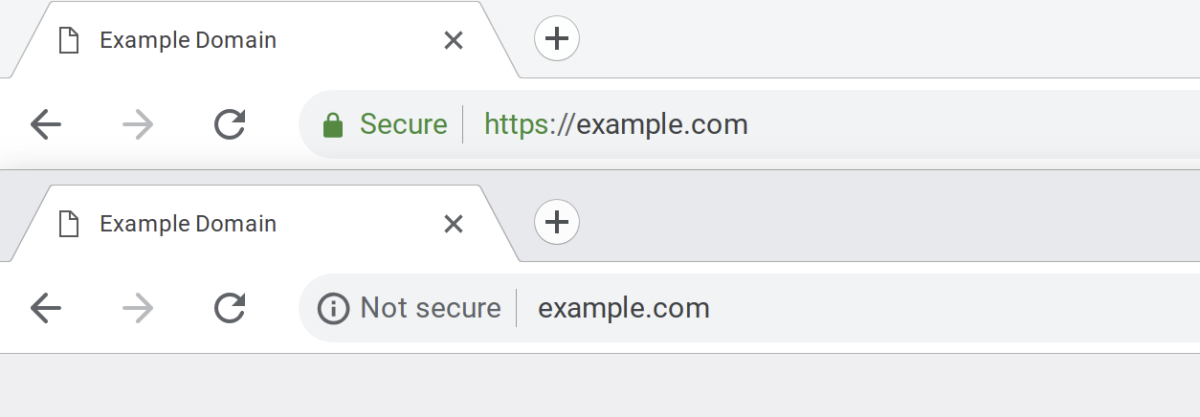
For some time now, The Web has been increasing the value it places on websites that are secure. Specifically, Google does this by giving higher search ranking to secure sites and by displaying a message or a padlock icon in the address bar of their Chrome browser.
In July 2018, Google pushed this a bit more – as explained in this blog post earlier in the year – with a more explicit “Not secure” message. Although many sites don’t collect any personal information that isn’t anonymised for traffic analytics, for the benefit of visitor confidence and SEO rankings it makes sense to switch over any non-secure sites to HTTPS as soon as possible.
I build and manage quite a few websites and use Webfaction (affiliate link) as my host. Making the switch to HTTPS involves a few careful and chronological steps so, for the benefit of anyone else using Webfaction, I’ve laid out my process below. What follows is a technical article.
Last updated: 14 September 2018
Context
- Webfaction (WF) as web-host for static or PHP websites
- Using Let's Encrypt certificates (certs)
- Automatic renewal of certs (they expire after 3 months)
- Live/Production and Dev websites (applications) each with own (sub)domain(s)
- 301 redirects to
https(non-www) from:http://,http://www.,https://www. - This has been tested on: statics sites, Statamic sites (v1 & v2)
If you're following this guide, you'll want to run through all the steps on your dev site/app first, commit and push the changes with Git and then repeat with your live site/app.
Variables NB: These are placeholders values. "Find & replace" will be helpful for your own setup.
- DevDomain:
dev.example.com - LiveDomain:
example.com - wwwDomain:
www.example.com - DevApp:
exdev - LiveApp:
exlive - WFUser:
tester - Server:
Wf-203-0-113-0Note the capital W - ServerPW:
XxXxXxXxNB: Password for my.webfaction.com control password and Webfaction API
The Chronological Process
01. Two scripts are required for this process and only need to be installed on server once.
01.1 acme.sh by Neilpang: Generates the certificates. Install with: curl https://get.acme.sh | sh
01.2 acme_webfaction.py by Greg Brown: Issues and auto-renews certificates on Webfaction. Install with:
wget https://raw.githubusercontent.com/gregplaysguitar/acme-webfaction/master/acme_webfaction.py
cp ./acme_webfaction.py ~/bin/
chmod +x ~/bin/acme_webfaction.py
01.3 You may need to logout of the SSH session and log back in to activate acme.sh script
02. Ensure that the scripts can create a hidden file and are then publicly accessible
- Check
.htaccessfile (at webroot) has the following:
# Block access to hidden files and directories, with the exception of /.well-known
RedirectMatch 404 /(?!.well-known)(\.)\w+
- Alternatively, you could temporarily disable
.htaccesswithmv .htaccess temp.httaccess
03. Test and then generate certificates
- SSH into the server and stay at root
Dev Test:
acme.sh --issue --test -d dev.example.com -w ~/webapps/exdev
Dev Issue:
acme.sh --issue -d dev.example.com -w ~/webapps/exdev --force
Live (non-www & www) Test:
acme.sh --issue --test -d example.com -d www.example.com -w ~/webapps/exlive
Live (non-www & www) Issue:
acme.sh --issue -d example.com -d www.example.com -w ~/webapps/exlive --force
04. Add the certs in the WF Control Panel
- 04.1 Visit: WebFaction Control Panel
- 04.2 Click Add SSL Certificate > Select Copy & paste certificate
- 04.3 Use the same name as the WF app name:
- Dev cert name:
exdev - Live cert name:
exlive - NB: Domains and Expiry date fields will be auto-populated by WF after saving the new certificate.
- Dev cert name:
Dev: Copy & paste the contents of the certificate files
04.4 (SSH) Navigate to the certificates folder:
cd .acme.sh/dev.example.com04.5 Open certs using vim > copy to clipboard (select all text with mouse) > paste (ctrl+shift+v) into WF CP
- Certificate:
vim dev.example.com.cer - Private key:
vim dev.example.com.key - Intermediates/bundle:
vim ca.cer
- Certificate:
Live: non-www & www Copy & paste the contents of the certificate files
04.4 (SSH) Navigate to the certificates folder:
cd .acme.sh/example.com04.5 Open certs using vim > copy to clipboard (select all text with mouse) > paste (ctrl+shift+v) into WF CP
- Certificate:
vim example.com.cer - Private key:
vim example.com.key - Intermediates/bundle:
vim ca.cer
- Certificate:
05. Create websites & add certificates
- For each public facing website one application will be used and assigned to two websites.
- Dev website 1:
- Name:
exdev - https (turned on) > select certificate
exdev - Domains:
dev.example.com - Contents (application):
exdev
- Name:
- Dev website 2:
- Name:
exdev_http(this allows the http > https redirect to occur) - http (not https)
- Domains:
dev.example.com - Contents (application):
exdev
- Name:
- Live website 1:
- Name:
exlive - https (turned on) > select certificate
exlive - Domains:
example.com, www.example.com(an htaccess rule redirects www > non-www) - Contents (application):
exlive
- Name:
- Live website 2:
- Name:
exlive_http(this allows the http > https redirect to occur) - http (not https)
- Domains:
example.com, www.example.com(an htaccess rule redirects www > non-www) - Contents (application):
exlive
- Name:
06. Install certificates
(SSH) Return to SSH terminal and change to root with
cd ~Dev:
acme.sh --install-cert -d dev.example.com \
 --reloadcmd "WF_SERVER=Wf-203-0-113-0 WF_USER=tester WF_PASSWORD=XxXxXxXx WF_CERT_NAME=exdev acme_webfaction.py"
- Live: non-www & www
acme.sh --install-cert -d example.com -d www.example.com \
 --reloadcmd "WF_SERVER=Wf-203-0-113-0 WF_USER=tester WF_PASSWORD=XxXxXxXx WF_CERT_NAME=exlive acme_webfaction.py"
07. Setup automatic renewal (if not already previously done on server)
- Setup a cronjob to run nightly to check if any certificates need renewing (they last 3 months)
- (SSH)
crontab -e(Opens crontab file in text editor)
NB: The code below is set for 00:30 (half-midnight), but this could be set for anytime. crontab.guru is helpful for understanding cron schedule expressions.
30 0 * * * "/home/tester/.acme.sh"/acme.sh --cron --home "/home/tester/.acme.sh" > /dev/null
08. Update variables and setup redirects
- 08.1 If necessary (see Step 02), re-enable
.htaccessfile withmv temp.htaccess .httaccess - 08.2 If using Statamic with environments, set site URL variable for locale:
- Dev:
cd webapps/exdev>vim .env
APP_ENV=dev
SITE_URL=https://dev.example.com
- Live:
cd webapps/exlive>vim .env
APP_ENV=production
SITE_URL=https://example.com
- 08.3 Adjust
robots.txton live site to include https onsitemap&host
Sitemap: https://example.com/sitemap
Host: https://example.com
- 08.4 Review codebase for any hardcoded http references (files that your site will ask the browser to load – external CSS, JS libraries, etc.). This is small note here, but is potentially a piece of work in itself depending on how your site is constructed. For Statamic sites, check your
layouts,CSS,JSand any content with embed code (Vimeo, YouTube, etc.). - 08.5 Setup 301 redirects to the
https(non-www) web address from:http://,http://www.,https://www.
NB: For the Live site this will likely be the point at which you use Git to pull in the changes you made when setting up the Dev site.
RewriteEngine On
#
# Redirect all http and www traffic to https non-www URL
# Ref for all but first line: https://simonecarletti.com/blog/2016/08/redirect-domain-http-https-www-apache/
# Ref to correct for Webfaction using nginx ssl proxy: cpbotha.net... https://goo.gl/Vnbdw9
#
RewriteCond %{HTTP:X-Forwarded-SSL} !on [OR]
RewriteCond %{HTTP_HOST} ^www\. [NC]
RewriteCond %{HTTP_HOST} ^(?:www\.)?(.+)$ [NC]
RewriteRule ^ https://%1%{REQUEST_URI} [L,NE,R=301]
09. Test and inform
- 09.1 Test redirects from:
http://,http://www.,https://www. - 09.2 Check certificates: Why No Padlock?
- 09.3 Add & verify new properties on Google Search Console
- Google treats these four addresses as separate properties
https://example.comhttps://www.example.comhttp://example.comhttp://www.example.com
- 09.4 Google Analytics: change property setting to https
- analytics.google.com > Select property > _Property Settings > _Default URL
- 09.5 Update any links on social media profiles, email signatures, etc